Saturday, July 7, 2012

improve c++ autocomplete in vim with clang-complete plugin

clang-complete is a powerful vim autocomplete plugin for c/c++ developers. Unlike the famous OmniCppComplete plugin, which makes use of ctag database to implement completion, the clang-complete plugin take advantage of the clang compiler. With the help of compiler, far more knowledge can be gained than the tag matching method. So the plugin can achieve a very precise completion, just like how visual studio does.

clang-complete mode

1. executable mode

In this mode, each time we trigger a completion (Ctrl_X Ctrl_U) in vim, the plugin will invoke the clang executable on the specified position in source code, then read and parse the executable's output to use as the candidates list.

2. library mode

In this mode, the plugin will run a python script to invoke the libclang library to get the candidates list. As the author indicates, the libclang library employs cache mechanism and runs much faster than the executable mode. I also observed another difference. On windows, the clang.exe may fail to compile our source code and returns a non-0 exit code. In this case, the plugin only returns an empty list, even though it may be able to produce a correct list. But the library mode doesn't have this limitation. So, it's the recommended way to use.

how to use it

Ubuntu

By following instructions in this wiki page, the plugin works very well on ubuntu. The only thing wasn't mentioned in the documenataion is that in order to use library mode, we must install the libclang-dev package.

Windows

The experience of using the plugin of windows is much more difficult.

1. Get a windows version clang

Since new version (v3.1) of clang can be compiled with visual studio, it's not difficult to compile the clang.exe and libclang.dll myself. Just note that though the clang can run on windows and can compile our c++ code, it can't performing linking. That's fair enough to simply use clang for our purpose.
And you can get the binaries I compiled here, for free :).

2. Get right output in executable mode

The clang.exe on windows outputs a lot of message to stderr, which are not interested by the plugin at all. Because the plugin uses system() function to invoke clang.exe, and the function will automatically redirect stderr to stdout by default. The author of the plugin suggests we can use let g:clang_user_options = '2> NUL || exit 0"' to get rid of stderr output. But it doesn't work for me. And I finally come up with this patch to fix the problem.
diff --git a/plugin/clang_complete.vim b/plugin/clang_complete.vim
old mode 100644
new mode 100755
index 7cb0fe0..6db164d
--- a/plugin/clang_complete.vim
+++ b/plugin/clang_complete.vim
@@ -421,6 +421,8 @@ function! s:ClangCompleteBinary(base)
     return {}
   endtry
   let l:escaped_tempfile = shellescape(l:tempfile)
+  let l:shellredir_orig = &shellredir
+  let &shellredir ='>%s 2>NUL'

   let l:command = g:clang_exec . ' -cc1 -fsyntax-only'
         \ . ' -fno-caret-diagnostics -fdiagnostics-print-source-range-info'
@@ -429,6 +431,8 @@ function! s:ClangCompleteBinary(base)
         \ . ' ' . b:clang_parameters . ' ' . b:clang_user_options . ' ' . g:clang_user_options
   let l:clang_output = split(system(l:command), "\n")
   call delete(l:tempfile)
+  " restore original shellredir
+  let &shellredir = l:shellredir_orig

   call s:ClangQuickFix(l:clang_output, l:tempfile)
   if v:shell_error

3. Make python ctypes module to work in library mode

The plugin uses ctypes module to invoke the libclang.dll. Due to a mysterious reason, the ctypes module can't be loaded successfully when run from embedded python in vim. I got the the "ImportError: No module named _ctypes" error and the plugin failed to work. But when I tested from a standalone python instance, the ctypes module worked well. After some debugging, it seems the embedded python doesn't search {python_root}/dlls directory to load _ctypes.pyd file, but the standalone python does. So I take a nasty method to solve the problem by copying the _ctypes.pyd to the clang_complete's plugin directory, right besides libclang.py file.

Saturday, June 30, 2012

got multiple singleton instances

We meet a subtle bug while adopting singleton design pattern in a project. The singleton class creates multiple instances.
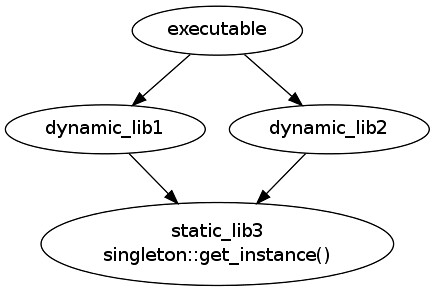
The image below depicts the dependency relationship between different modules.


The executable depends on two dynamic libraries, dynamic_lib1 and dynamic_lib2. And both dynamic_lib1 and dynamic_lib2 depends on static_lib. There is a singleton class in static_lib. dynamic_lib1 and dynamic_lib2 use get_instance method to retrieve the instance of the singleton class.
The basic skeleton of the singleton class is shown below:

 1 // singleton.h
 2 #pragma once
 3 
 4 class __declspec(dllexport)  singleton
 5 {
 6 public:
 7     singleton(void);
 8     ~singleton(void);
 9 
10     static singleton* instance;
11     static singleton* get_instance();
12 };
13 
14
15
// singleton.cpp
16 #include "singleton.h"
17 #include <iostream>
18 
19 singleton* singleton::instance;
20 
21 singleton::singleton(void)
22 {
23 }
24 
25 singleton::~singleton(void)
26 {
27 }
28 
29 
30 singleton* singleton::get_instance()
31 {
32     // lock here
33     if(!instance)
34     {
35         instance = new singleton();
36     }
37     // unlock here
38     return instance;
39 }


But when we run the executable, we're surprised to find that the the use of get_instance method in dynamic_lib1 and dynamic_lib2 doesn't share the same instance.

After thinking about it carefully, it's clear that the bug is caused by we use static_lib3 as a static library. When we compile dynamic_lib1 and dynamic_lib2, they both link with static_lib, and each get a separate copy of the singleton::instance in data section.

But be aware that the behavior is compiler specific. The singleton is still singleton when I tested with gcc. And the singleton got created multiple instances when I tested microsoft's C++ compiler and apple's developer tools.

Friday, May 11, 2012

port libcurl to wince

libcurl is a powerful network transfer library. It has support for many popular protocols and can make our application easier to integrate with other network servers.
libcurl requires some posix headers to compile, which isn't available on windows ce platform. In order to port it, we must provide a  posix adapter layer, which can be achieved with wcecompat library.
It's not enough to only have wcecompat library, because the source code of libcurl isn't fully wince compatible. We can apply this patch to libcurl source code to make it compile fine.

Friday, March 9, 2012

build subversion 1.7 for ubuntu 11.04

subversion 1.7 has many new fascinating features, like viewing diff in svn log command, and a cleaner directory layout (only one .svn folder in root directory, just like git does). But this version isn't available in ubuntu's official source. To upgrade to this new version, I choose to build it myself.

  1. Download neon, which adds http and https protocol support to svn
  2. cd to neon source root directory and run: ./configure --enable-shared --with-ssl
  3. Then run: make && sudo make install
  4. Download and extract svn source
  5. Download sqlite-amalgamation , extract it and copy to sqlite-amalgamation
  6. cd to svn source root directory
  7. run svn co http://svn.apache.org/repos/asf/apr/apr-util/branches/1.3.x apr-util
  8. run svn co http://svn.apache.org/repos/asf/apr/apr/branches/1.3.x apr
  9. cd to apr and run: ./buildconf
  10. cd to apr-util and run: ./buildconf
  11. go back to svn source root directory and run: ./configure --with-ssl
  12. edit files below
    apr/build/apr_rules.mk:38  change $(top_builddir) to $(apr_builddir)
    apr-util/build/rules.mk:38  change $(top_builddir) to $(apr_builddir)
  13. make
  14. sudo make install

Wednesday, February 22, 2012

solve "Host 'awk' tool is outdated." problem for ndk

While using ndk-build command in ndk r7 to build a project on 32-bit ubuntu, I got this error:
Android NDK: Host 'awk' tool is outdated. Please define HOST_AWK to point to Gawk or Nawk !

It didn't work even if I add the HOST_AWK environment variable and point it to gawk.
There are two reasons:
  1. The prebuilt awk tool comes with ndk r7 is compiled for 64bit and can't run on 32bit os
  2. The HOST_AWK environment variable is overridden by {ndk_root}/build/core/init.mk to point to the prebuilt awk comes with ndk

To solve this problem, remove {ndk_root}/prebuilt/linux-x86/bin/awk. Now the ndk-build script will use correct awk tool.

Saturday, January 7, 2012

adepends.py, utility for analysing android module dependency

There are thousands of modules within android system. They form a very complicated dependency graph. When we want to learn about a particular module in android system, it's not easy to find out where modules that are dependent on by the module we mainly focus on are located. To make this task easier, I wrote adepends.py, which can be used to analysis dependency relationship between modules. It's capable of:
  1. List modules defined within a directory
  2. Generate a graphviz dot based diagram file to show dependency relationship
To show which modules are defined in a directory, we can use this command: "adepends.py -l DIRECTORY_NAME". For example, if we run "adepends.py -l external/protobuf/" command, we get below output:
libprotobuf-java-2.3.0-micro
libprotobuf-cpp-2.3.0-lite
host-libprotobuf-java-2.3.0-micro
libprotobuf-cpp-2.3.0-full
host-libprotobuf-java-2.3.0-lite
aprotoc
libprotobuf-java-2.3.0-lite

To generate a dependency diagram for a particular module, we can use this command: "adepends.py -o output.dot -m module_name". For example, if we're interested in the dependency diagram for charger module,  we can use this command: "adepends.py -o output.dot -m charger". After the command finished, we have output.dot in current directory. Then we run "dot -Tpng -ooutput.png output.dot" to generate a png file for the diagram. And the diagram is shown below:

Each ellipse represents a module, the top line shows the module name, and the bottom line shows the directory that the module is defined. The arrowed edge represents the dependency relationship between two modules.

Monday, December 5, 2011

conditional compilation on wince

While designing BSP, it's very common to enable or disable some features based on our requirements. Subsequently, we may need to change our code according to the feature's availability.
On a wince system, the status of a feature's availability is controlled via batch files, either cesysgen.bat (controls standard ce modules and functions) or {platform_name}.bat (controls platform specific settings). The status of a feature is set through environment variable in the batch file. The build system will build the image according to environment variables. For instance, the following line in a batch file instruct not to support SDMMC boot.

set BSP_NOSDMMC_BOOT=1

It may be desired to change our code based on the aforementioned setting. But the problem is the compiler (to be specific, preprocessor) can't see the value of BSP_NOSDMMC_BOOT environment variable. So, in order to pass the value to compiler, we need the help of build system. Just like gnu make, the wince build system can see the environment variable and define a macro for the compiler.
The code snippet below is extracted from a sources file, and shows how to define macro according to the BSP_NOSDMMC_BOOT's value.

!IF "$(BSP_NOSDMMC_BOOT)"=="0"
CDEFINES = $(CDEFINES) -DBSP_NOSDMMC_BOOT
!ENDIF


Then, in our code, we can use the BSP_NOSDMMC_BOOT macro to do conditional compilation.
And if we want to disable the whole module based on the environment variable's value, we can define SKIPBUILD in sources file, like this:

!if "$(BSP_NOSDMMC_BOOT)"=="1"
SKIPBUILD = 1
!endif

Tuesday, November 29, 2011

use protobuf on iphone app

This post is a step by step tutorial showing how to use protobuf in iphone application. It shows how to:
  • Create a reusable static library
  • Create a executable project
  • Mix C++ code with object C code
1. Start terminal, cd to root folder of protobuf and run ./configure here to generate config.h header file and makefile.

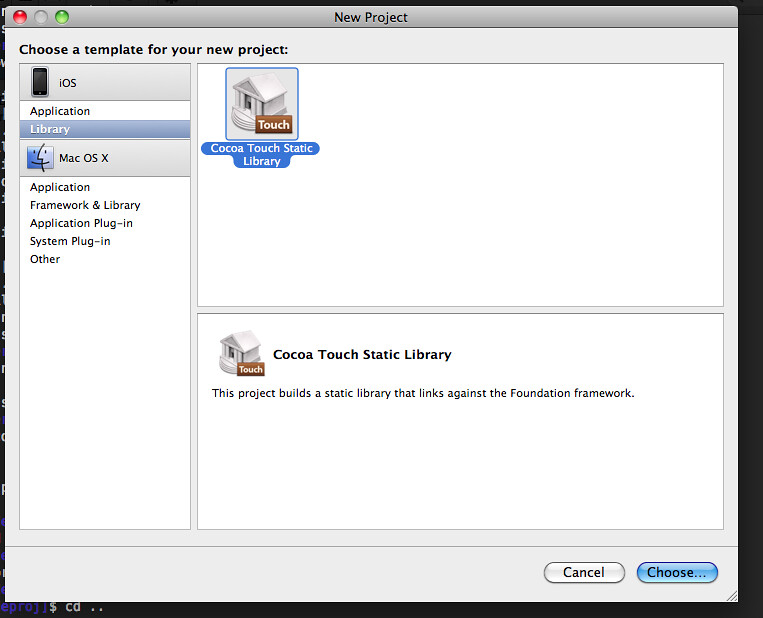
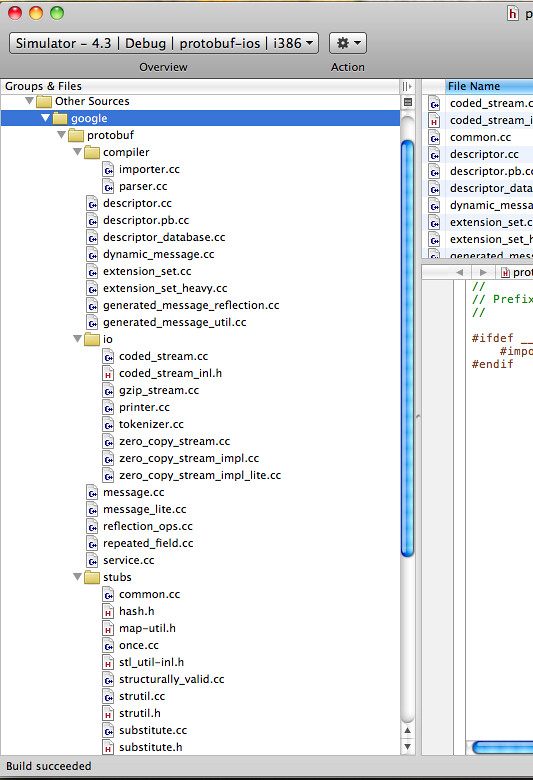
2. Start XCode and create a new project. Select iOS - Library - Cocoa Touch Static Library project template.

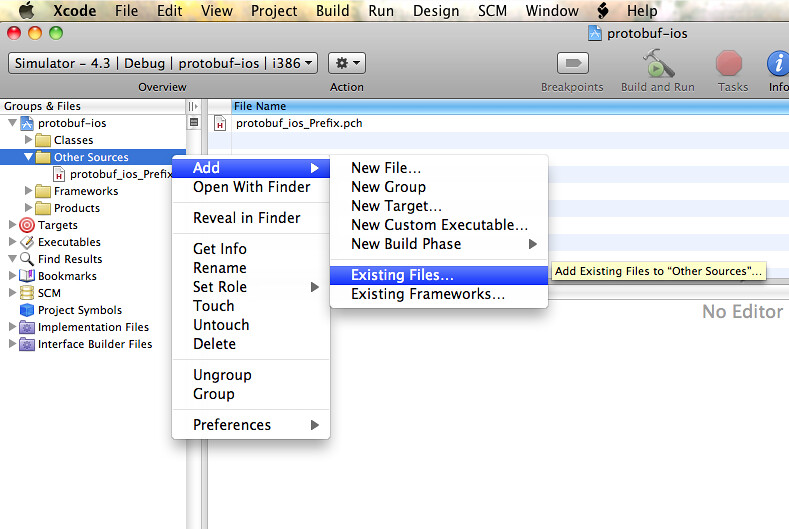
3. Right click Other Sources and select add Existing Files.

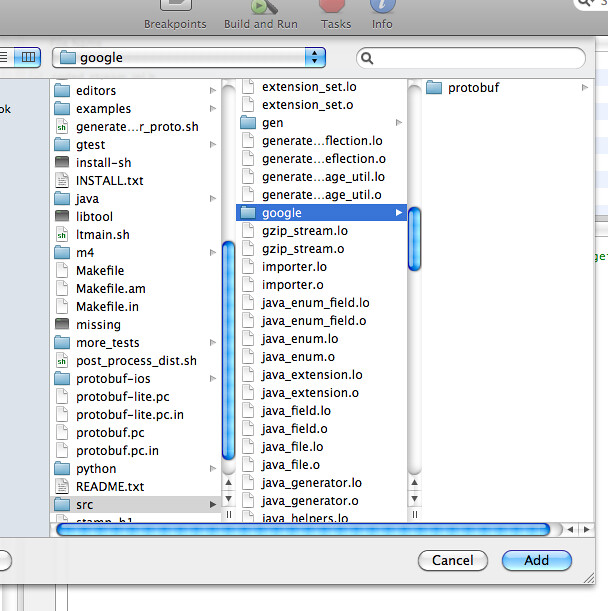
4. Select the src/google directory, and add the directory recursively.

5. In the previous step, we add too much source files than actually needed. The sources files for the protoc compiler and unittest are included too. They're not needed to run ios application. To filter out unnecessary files, we can refer to the libprotobuf_lite_la_SOURCES and libprotobuf_la_SOURCES variables in src/Makefile, which list source files needed for protobuf library.

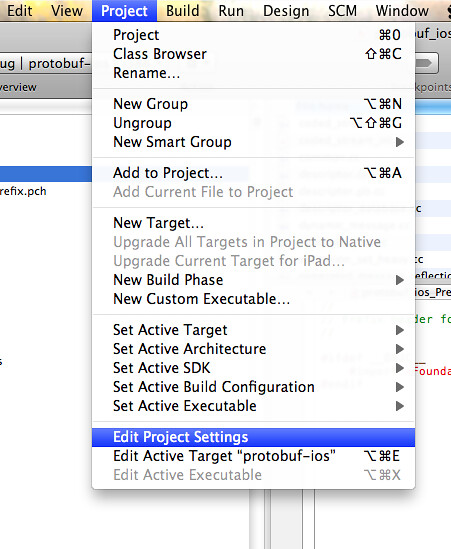
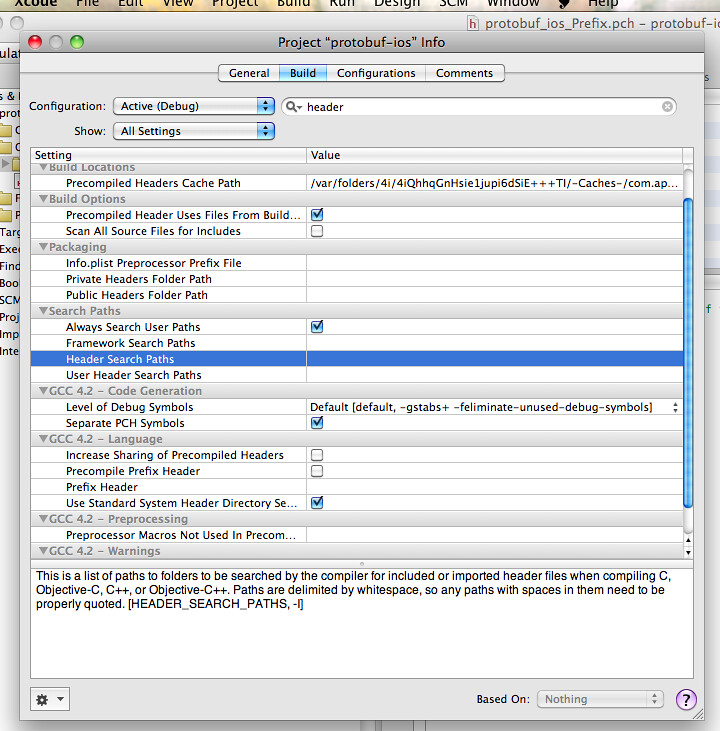
6. Now we need to add header file search path. Click Edit Project Settings under Project menu item.

7. Double click Header Search Paths.

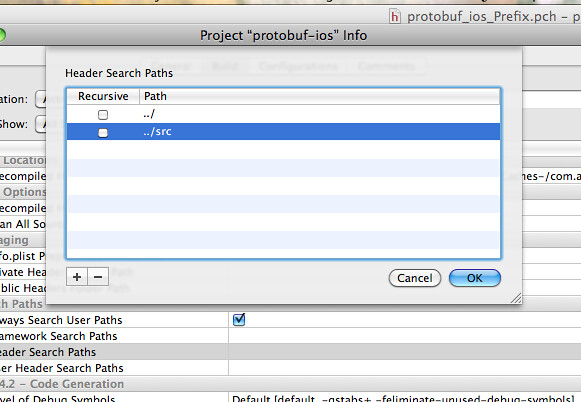
8. Add protobuf and protobuf/src directory.

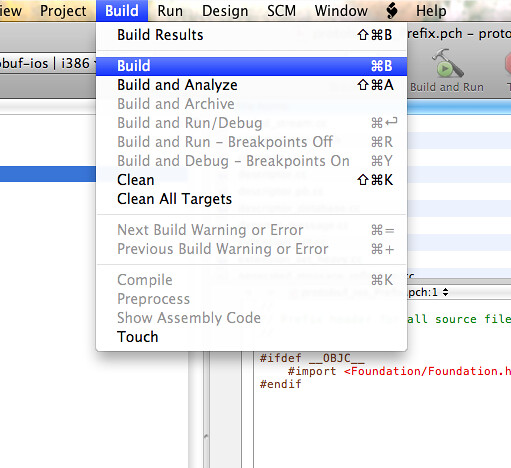
9. Now build the project.

10. In the terminal, run "make install" command to build protoc compiler and install it to default location(/usr/local/bin/protoc).

11. Go to examples directory and run "protoc addressbook.proto --cpp_out=./" to generate addressbook.pb.cc and addressbook.pb.h files.

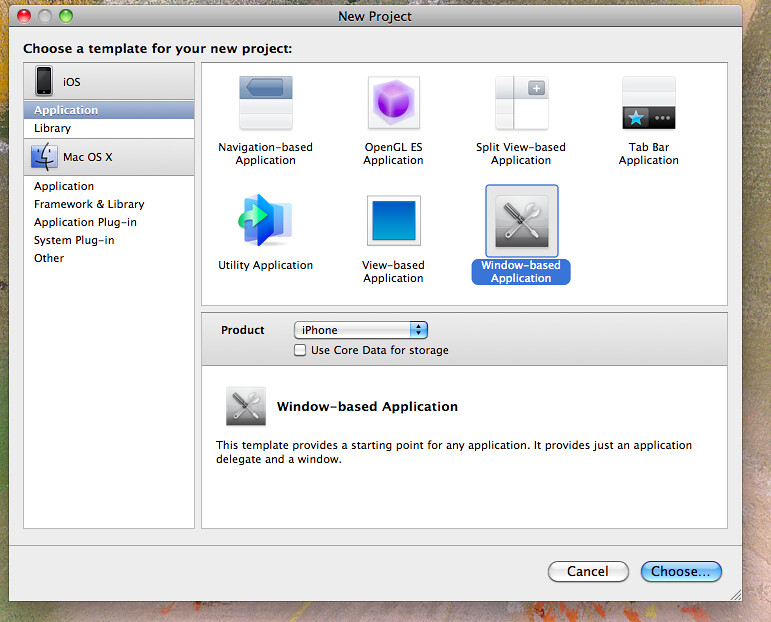
12. Create a Window-Based Application.

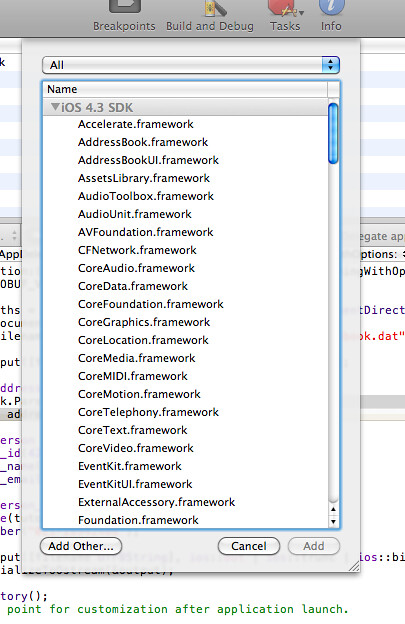
13. Add reference to the static library we built. Right click Frameworks and select Add Existing Frameworks.

14. Click Add Other button.

15. Select the libprotobuf_ios.a file and click add button. Also, we need to add protobuf/src and protobuf/examples directory to Header Search Paths for this project.

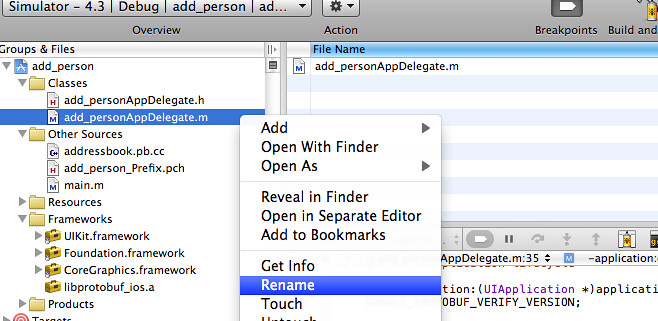
16. Rename add_personAppDelegate.m to add_personAppDelegate.mm so that it'll be compiled as object C++.

17. The basic logic of add_personAppDelegate.mm is first create the addressbook.dat file in iphone's document directory. Then create a new AddressBook instance and add a person to it. Finally serialize the addressbook to the file we created. The full source is :

#import "add_personAppDelegate.h"


#include "addressbook.pb.h"
#include <fstream>

using namespace std;

@implementation add_personAppDelegate

@synthesize window;


#pragma mark -
#pragma mark Application lifecycle

(BOOL)application:(UIApplication *)application didFinishLaunchingWithOptions:(NSDictionary *)launchOptions {  
    GOOGLE_PROTOBUF_VERIFY_VERSION;   

    NSArray *paths = NSSearchPathForDirectoriesInDomains(NSDocumentDirectory, NSUserDomainMask, YES);
    NSString *documentDirectory = [paths objectAtIndex:0];
    NSString *filename = [NSString stringWithFormat:@"%@/addressbook.dat", documentDirectory];   

    ifstream input([filename UTF8String], ios::in | ios::binary);   

    tutorial::AddressBook address_book;  
    address_book.ParseFromIstream(&input);
    int count = address_book.person_size();  
    tutorial::Person *person = address_book.add_person();
    person->set_id(42);
    person->set_name("raymond");
    person->set_email("raymond@gmail.com");   

    tutorial::Person_PhoneNumber *pn = person->add_phone();

    pn->set_type(tutorial::Person_PhoneType_WORK);
    pn->set_number("12345678");   

    fstream output([filename UTF8String], ios::out | ios::trunc | ios::binary);
    person->SerializeToOstream(&output);   

    NSHomeDirectory();
    // Override point for customization after application launch.   

    [self.window makeKeyAndVisible]; 

    return YES;
}


(void)applicationWillResignActive:(UIApplication *)application {
    /*
     Sent when the application is about to move from active to inactive state. This can occur for certain types of temporary interruptions (such as an incoming phone call or SMS message) or when the user quits the application and it begins the transition to the background state.
     Use this method to pause ongoing tasks, disable timers, and throttle down OpenGL ES frame rates. Games should use this method to pause the game.
     */
}


(void)applicationDidEnterBackground:(UIApplication *)application {
    /*
     Use this method to release shared resources, save user data, invalidate timers, and store enough application state information to restore your application to its current state in case it is terminated later.
     If your application supports background execution, called instead of applicationWillTerminate: when the user quits.
     */
}


(void)applicationWillEnterForeground:(UIApplication *)application {
    /*
     Called as part of  transition from the background to the inactive state: here you can undo many of the changes made on entering the background.
     */
}

(void)applicationDidBecomeActive:(UIApplication *)application {
    /*
     Restart any tasks that were paused (or not yet started) while the application was inactive. If the application was previously in the background, optionally refresh the user interface.
     */
}


(void)applicationWillTerminate:(UIApplication *)application {
    /*
     Called when the application is about to terminate.
     See also applicationDidEnterBackground:.
     */
}

#pragma mark -
#pragma mark Memory management


(void)applicationDidReceiveMemoryWarning:(UIApplication *)application {
    /*
     Free up as much memory as possible by purging cached data objects that can be recreated (or reloaded from disk) later.
     */
}

(void)dealloc {
    [window release];
    [super dealloc];
}

@end


18. After build and run the application in iphone emulator, we get generated addressbook.dat file in /Users/user_name/Library/
Application Support/iPhone Simulator/4.3/Applications/9AF109CF-1B33-49DA-BE73-603CC798408F/Documents/addressbook.dat

Thursday, November 24, 2011

port protobuf-lite to wince

protobuf is a wonderful project that helps us implement communication protocol. There are a lot of benefits to use it in practical project, including:
  1. It has an efficient binary serialization algorithm
  2. It runs cross platforms
  3. It support mainstream programming languages, c++, python and java. there are also lots of porting out there for other popular languages.
  4. It's designed to make protocols both backward and forward compatible.
  5. It enables developers to focus on protocol design.
 Currently, there is no official windows CE version for protobuf. It's not an easy task to port protobuf full version to windows CE. But the lite version, which supports less feature than full version (check the explanation for optimize_for option in this page for what's the difference), is easier to port. Here is how I port it:

  1. Create a Win32 Smart Device Project library project, name it protobuf-lite-ce
  2. Copy all source files from protobuf-lite project to protobuf-lite-ce project in Solution Explorer
  3. Create a ce_port folder in the project's directory, and copy the errno.h header file from (Visual_Studio_Root)/VC/include into the folder. This is because Windows CE doesn't have this file, so we need to provide one. Actually, this errno.h can be a pure empty file.
  4. Add "../src;.;./ce_port" to the project's Additional Include Directories.
  5. The windef.h header file already defines OPTIONAL macro, it conflicts with Cardinality::OPTIONAL enum. So the extension_set.cc fails to compile, to solve this, add following code before enum Cardinality definition to undefine OPTIONAL:

#if defined(OPTIONAL)
#if defined(_MSC_VER)
#pragma message ("Unexpected OPTIONAL macro definition, #undefine OPTIONAL")
#else
#warning  "Unexpected OPTIONAL macro definition, #undefine OPTIONAL"
#endif
#undef OPTIONAL
#endif
namespace {

enum Cardinality {
  REPEATED,
  OPTIONAL
};

}  // namespace


Now the protobuf-lite-ce project should compiles fine.
Here is the project file for downloading. Just get everything there and place them in protobuf/vsprojects/ directory.

Sunday, October 30, 2011

why can we use printf without including stdio.h

I read the c programming language again to mourn Dennis Ritchie who passed away recently.

I noticed below statements in section "4.2 Functions Returning Non-integers", which explains the question, why can we use printf without including stdio.h.

The function atof must be declared and defined consistently. If atof itself and the call to it in main have inconsistent types in the same source file, the error will be detected by the compiler. But if (as is more likely) atof were compiled separately, the mismatch would not be detected, atof would return a  double that  main would treat as an  int, and meaningless answers would result. 
In the light of what we have said about how declarations must match definitions, this might seem surprising. The reason a mismatch can happen is that if there is no function prototype, a function is implicitly declared by its first appearance in an expression, such as
   sum += atof(line)
If a name that has not been previously declared occurs in an expression and is followed by a left parentheses, it is declared by context to be a function name, the function is assumed to return an  int, and nothing is assumed about its arguments. Furthermore, if a function declaration does not include arguments, as in
   double atof();
that too is taken to mean that nothing is to be assumed about the arguments of atof; all parameter checking is turned off. This special meaning of the empty argument list is intended to permit older C programs to compile with new compilers. But it's a bad idea to use it with new C programs. If the function takes arguments, declare them; if it takes no arguments, use
void.

So, let's take a look at the hello world sample below:

1 //#include  <stdio.h>
2
3 int main(int argc, char *argv[])
4 {
5     printf("hello world!\n");
6     return 0;
7 }

When the code is compiled, the statement on line 5 implicitly declares the printf function because it's not declared explicitly. It's the same as if we declared printf as:
  int printf();
And there is no assumption about its argument, so the code can pass the compile phase.

In link phase, unlike c++, only the function name (function signature doesn't matter) affects the symbol name. So the printf symbol name can be found from the standard c library which is linked automatically. As a result, the code above can compile and run successfully.

Sunday, October 23, 2011

stream audio via udp on android

In this post, I tried to play small audio data chunks with AudioTrack to show the feasibility of streaming audio. It's not straightforward enough. So I updated the sample code to actually transfer audio data with udp.
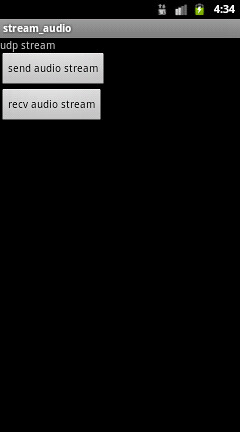
As the image below shows, the application is not too complicated.


The two buttons will each create a new thread to send and recv audio data respectively. And the sender will read audio data from the file /data/1.wav. Then, it sends the data to udp port 2048 on localhost. The receiver reads on 2048 port and feed data received to AudioTrack object.
Full code is available at:
http://code.google.com/p/rxwen-blog-stuff/source/browse/trunk/android/streaming_audio/src/rmd/media/StreamingAudio/UdpStream.java

Wednesday, October 12, 2011

microsoft's ifstream automatically removes carriage return

By default, the ifstream class in miscrosoft's STL converts a carriage return and new line (0x0d0a or crlf) pair to a single new line (0x0a) automatically while reading a text file.

Take the following code for example:


 #include    <cstdlib>
 2 #include    <fstream>
 3 #include    <iostream>
 4 
 5 using namespace std;
 6 
 7 int main ( int argc, char *argv[] )
 8 {
 9     ifstream fs("crlf.txt");
10     fs.seekg(0, ios::end);
11     int len = fs.tellg();
12     fs.seekg(0, ios::beg);
13 
14     char* buf = new char[len];
15     fs.read(buf, len);
16     cout << hex;
17     // dump buf in hex format
18     for(int i = 0; i < len; ++i)
19         cout << static_cast<int>(buf[i]) << " ";
20     cout << endl << dec << buf << endl;
21     cout << "file size: " << len
22         << " actual read len: " << fs.gcount() << endl;
23     return EXIT_SUCCESS;
24 }               // ----------  end of function main  ----------


And let's suppose the content of crlf.txt is:
hello\r\n
world\r\n

If we compile the code with microsoft's vc++ compiler, and run the executable against the preceeding text file, we get below output:
68 65 6c 6c 6f a 77 6f 72 6c 64 a 0 0
hello
world


file size: 14 actual read len: 12

As we can see, the 0x0d0a has been changed to 0x0a, and the number of bytes actually read is 12, other than 14. But if we compile the code with g++ and run the test, we get different output:

68 65 6c 6c 6f d a 77 6f 72 6c 64 d a
hello
world


file size: 14 actual read len: 14
The number of bytes actually read is now the same as the text file's size. And the bytes read into memory is the same as the original file's on disk.

In very rare cases, we may appreciate the microsoft ifstream's behavior, which saves our time from making such conversion our-self. But in most cases, it has negative consequence and incurs subtle bugs that are hard to debug.
Not sure why is it, just to be alerted by this specific behavior exhibited by microsoft's STL.