Friday, July 5, 2013

access github through proxy

In China mainland, you never know for what reason a website gets blocked by the fucking GFW. Even if the site has nothing to do with politics. github is a example, many developers in China are victims. This post is about how to access github via a proxy, such as goagent.
The git pull/push command can be instructed to access remote server via proxy by setting https_proxy environment variable. So, we can run commands below use proxy.
https_proxy=http://127.0.0.1:8087 git pull
or
export https_proxy=http://127.0.0.1:8087
git push
But we may get below error because the goagent ssl certificate can't be verified.
error: SSL certificate problem: unable to get local issuer certificate while accessing https://github.com/xxxxxxxxxxx
fatal: HTTP request failed
To resolve this problem, we can force git not to verify ssl ceritificate by setting GIT_SSL_NO_VERIFY environment variable.
export GIT_SSL_NO_VERIFY=true
git pull
To make these settings perminately for a git project or globally. We can write them to git config file.
git config http.proxy http://127.0.0.1:8087
git config http.sslVerify false
The resulting .git/config file is like this:
[core]
    repositoryformatversion = 0
    filemode = true
    bare = false
    logallrefupdates = true
    ignorecase = true
[remote "origin"]
    url = https://github.com/rxwen/my_posts.git
    fetch = +refs/heads/*:refs/remotes/origin/*
[branch "master"]
    remote = origin
    merge = refs/heads/master
[http]
    proxy = http://127.0.0.1:8087
    sslVerify = false
BTW, there is a rumour that Fang BingXing gets ill badly recently. Wish Death can conquer him as soon as possible, amen.

Friday, May 3, 2013

install gevent on mac os

This post is for Mac users in China who wants to fuck the gfw.
The goagent has been rewritten based on gevent. Though it still supported to run without gevent, it's recommended to install gevent.
It's pretty easy to install gevent on mac os with brew and pip tools.
  1. brew install libevent
  2. sudo pip install gevent greenlet

Tuesday, March 5, 2013

use wifi on raspberrypi

The raspberrypi has two usb ports, so I bought a usb wifi dongle to get rid of network cable.
fast_fw150us
This dongle uses RTL8188CUS chipset, which has built-in support on the raspberrypi linux kernel. So it just worked after I plugged it to raspberrypi.
The next step is to configure the dongle so that it can connect to my wifi router. There is GUI based connection manager if you're using raspbian system image. But in my case, I use a small system image built with built from builtroot with only command line interface, I have to setup manually.
I enabled wireless tools in buildroot config, which provides tools such as iwlist, iwconfig. My wifi router, which is configured with dhcp server enabled, doesn't required password to connect. So I can setup the network with commands below:
ifconfig wlan0 up
iwconfig wlan0 essid WIFI_ESSID
udhcpc -i wlan0
Having tested the network run ok, I updated the /etc/network/interfaces file so that network would be setup automatically.
auto lo
iface lo inet loopback

auto eth0
iface eth0 inet dhcp

auto wlan0
iface wlan0 inet dhcp
    pre-up ifconfig $IFACE up
    pre-up iwconfig $IFACE essid WIFI_ESSID
    down ifconfig $IFACE down
I struggled a lot with the interfaces file due to the dhcp always failed to work. And I finally found that the connman package caused the conflict. Disable it solved the problem.

Thursday, February 28, 2013

buildroot for raspberrypi

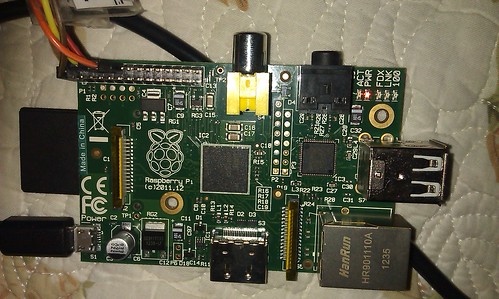
I bought a raspberrypi to try some interseting ideas on.
raspberry_pi_image
raspberrypi provides several images for downloading, but they are too large and exceeds my needs. My desired raspberrypi image should meet:
  1. fully customizing capabilities on kernel and user applications
  2. python support
  3. standard c&c++ libiaries
  4. serial port communication with peripheral devices
Luckily, here is a buildroot project customized for raspberrypi. With buildroot, all my requirements can be easily satisfied. So I forked from the repository and made some changes, to make the targe image minimal.
  1. disable Qt5 library
  2. disable boost library
  3. change kernel to the official one maintained by raspberrypi team
To build the target image, run commands below:
cp configs/raspberry_simple_defconfig .config
make
After the build is finished. I just need to copy the output/build/linux-rpi-3.6.y/arch/arm/boot/Image to kernel.img on boot partition on the sd card, and untar output/images/rootfs.tar to root filesystem partition.
Power on, and now raspberry pi should be running our own system.

Sunday, January 20, 2013

understanding android build system out directory

The android build system keeps a clean seperation of source and output. All intermediates and final output are placed in the directory named out. So, the simple way to fully clean a build is deleting the out directory.
The hierarchy of the out directory is shown below:
out/
|-- host/                           # the directory containing all tools and libraries of build system
 -- target/product/generic/         # the root of this product's out directory
    |-- data                        # the directory for creating data file system image
    |-- obj                         # the root directory of build process
    |   |-- APPS                    # android application 
    |   |-- ETC
    |   |-- EXECUTABLES             # the root directory containing all native executable build output
    |   |-- include
    |   |-- JAVA_LIBRARIES
    |   |-- lib                     # the directory containing copies of stripped shared libraries,
    |   |                           # other modules will search this directory for libraries to resolve linkage
    |   |-- PACKAGING
    |   |-- SHARED_LIBRARIES        # the root directory containing all native shared library build output
    |   |   |-- {LOCAL_MODULE_NAME}_intermediates    # the direcotry containing all build output for {LOCAL_MODULE_NAME} module
    |   |       |                                    # this naming convention is followed by all subdirectories of module
    |   |        -- LINKED          # the directory containing the linked binary file, e.g, .so file
    |    -- STATIC_LIBRARIES        # the root directory containing all native static library build output
    |-- root                        # the directory for creating root file system, ramdisk image
    |   |-- data
    |   |-- dev
    |   |-- proc
    |   |-- sbin
    |   |-- sys
    |    -- system
    |-- symbols                     # the directory contains all binary images that has debugging symbols
    |   |-- data
    |   |-- sbin
    |    -- system
     -- system                      # the directory for creating system.img, where most of appications and libraries reside
        |-- app
        |-- bin
        |-- etc
        |-- fonts
        |-- framework
        |-- lib
        |-- media
        |-- tts
        |-- usr
         -- xbin
Under the out/target/product/generic/obj directory, there are several subdirectories, APPS, EXECUTABLES, SHARED_LIBRARIES, STATIC_LIBRARIES. They contain build output for modules of different type, java application, native executable, shared libraries and static libraries, respectively. Under the module type's directory, there is a directory for each module of corresponding type, named with the module's name catenating _intermediates. So, when we need to clean a specific module, we can simply delete the intermediate directory for the module.
For example, in the Android.mk for stlport, there is a LOCAL_MODULE defined as libstlport, which is a shared library (by including $(BUILD_SHARED_LIBRARY)). The output of this module will be placed in SHARED_LIBRARIES/libstlport_intermediates directory. The linker will generate the final shared library in the SHARED_LIBRARIES/libstlport_intermediates/LINKED directory.
After a module has been compiled the linked, it's to be stripped and copied to directory for creating file system image. The build system doesn't perform stripping in place. Instead, it will first copy the file with debugging symbol information (the file under LINKED directory) to correct place in symbols directory. Then strip the file and save in intermediate directory (for executable) or obj/lib directory (for shared library), meanwhile, the file without symbol and the file with symbol are associated with 'objcopy --add-gnu-debuglink' command. Finally, the stripped file will be copied to system directory.
Once all modules are built, the system directory should have been populated with necessary files. The build system will create three file system images, ramdisk.img, userdata.img, and system.img with system, root and data as source directories respectively. The default choice of file system is yaffs2.